Register Login (480) 677-8170
  • Email
  • Facebook
  • Instagram
  • Pinterest
  • Twitter
  • YouTube
  • Home
  • Search
    • Search All Properties
    • Search by Map
    • New Build Home Search
    • Featured Listings
  • Buyers
  • Sellers
    • What is My Home Worth
  • Blog
  • About
    • About Us
    • Our Agents
    • Client Testimonials
    • Security Title
  • Contact

Recipe | Roasted Garlic by Encanterra® Resident and Author, Jules Meyer

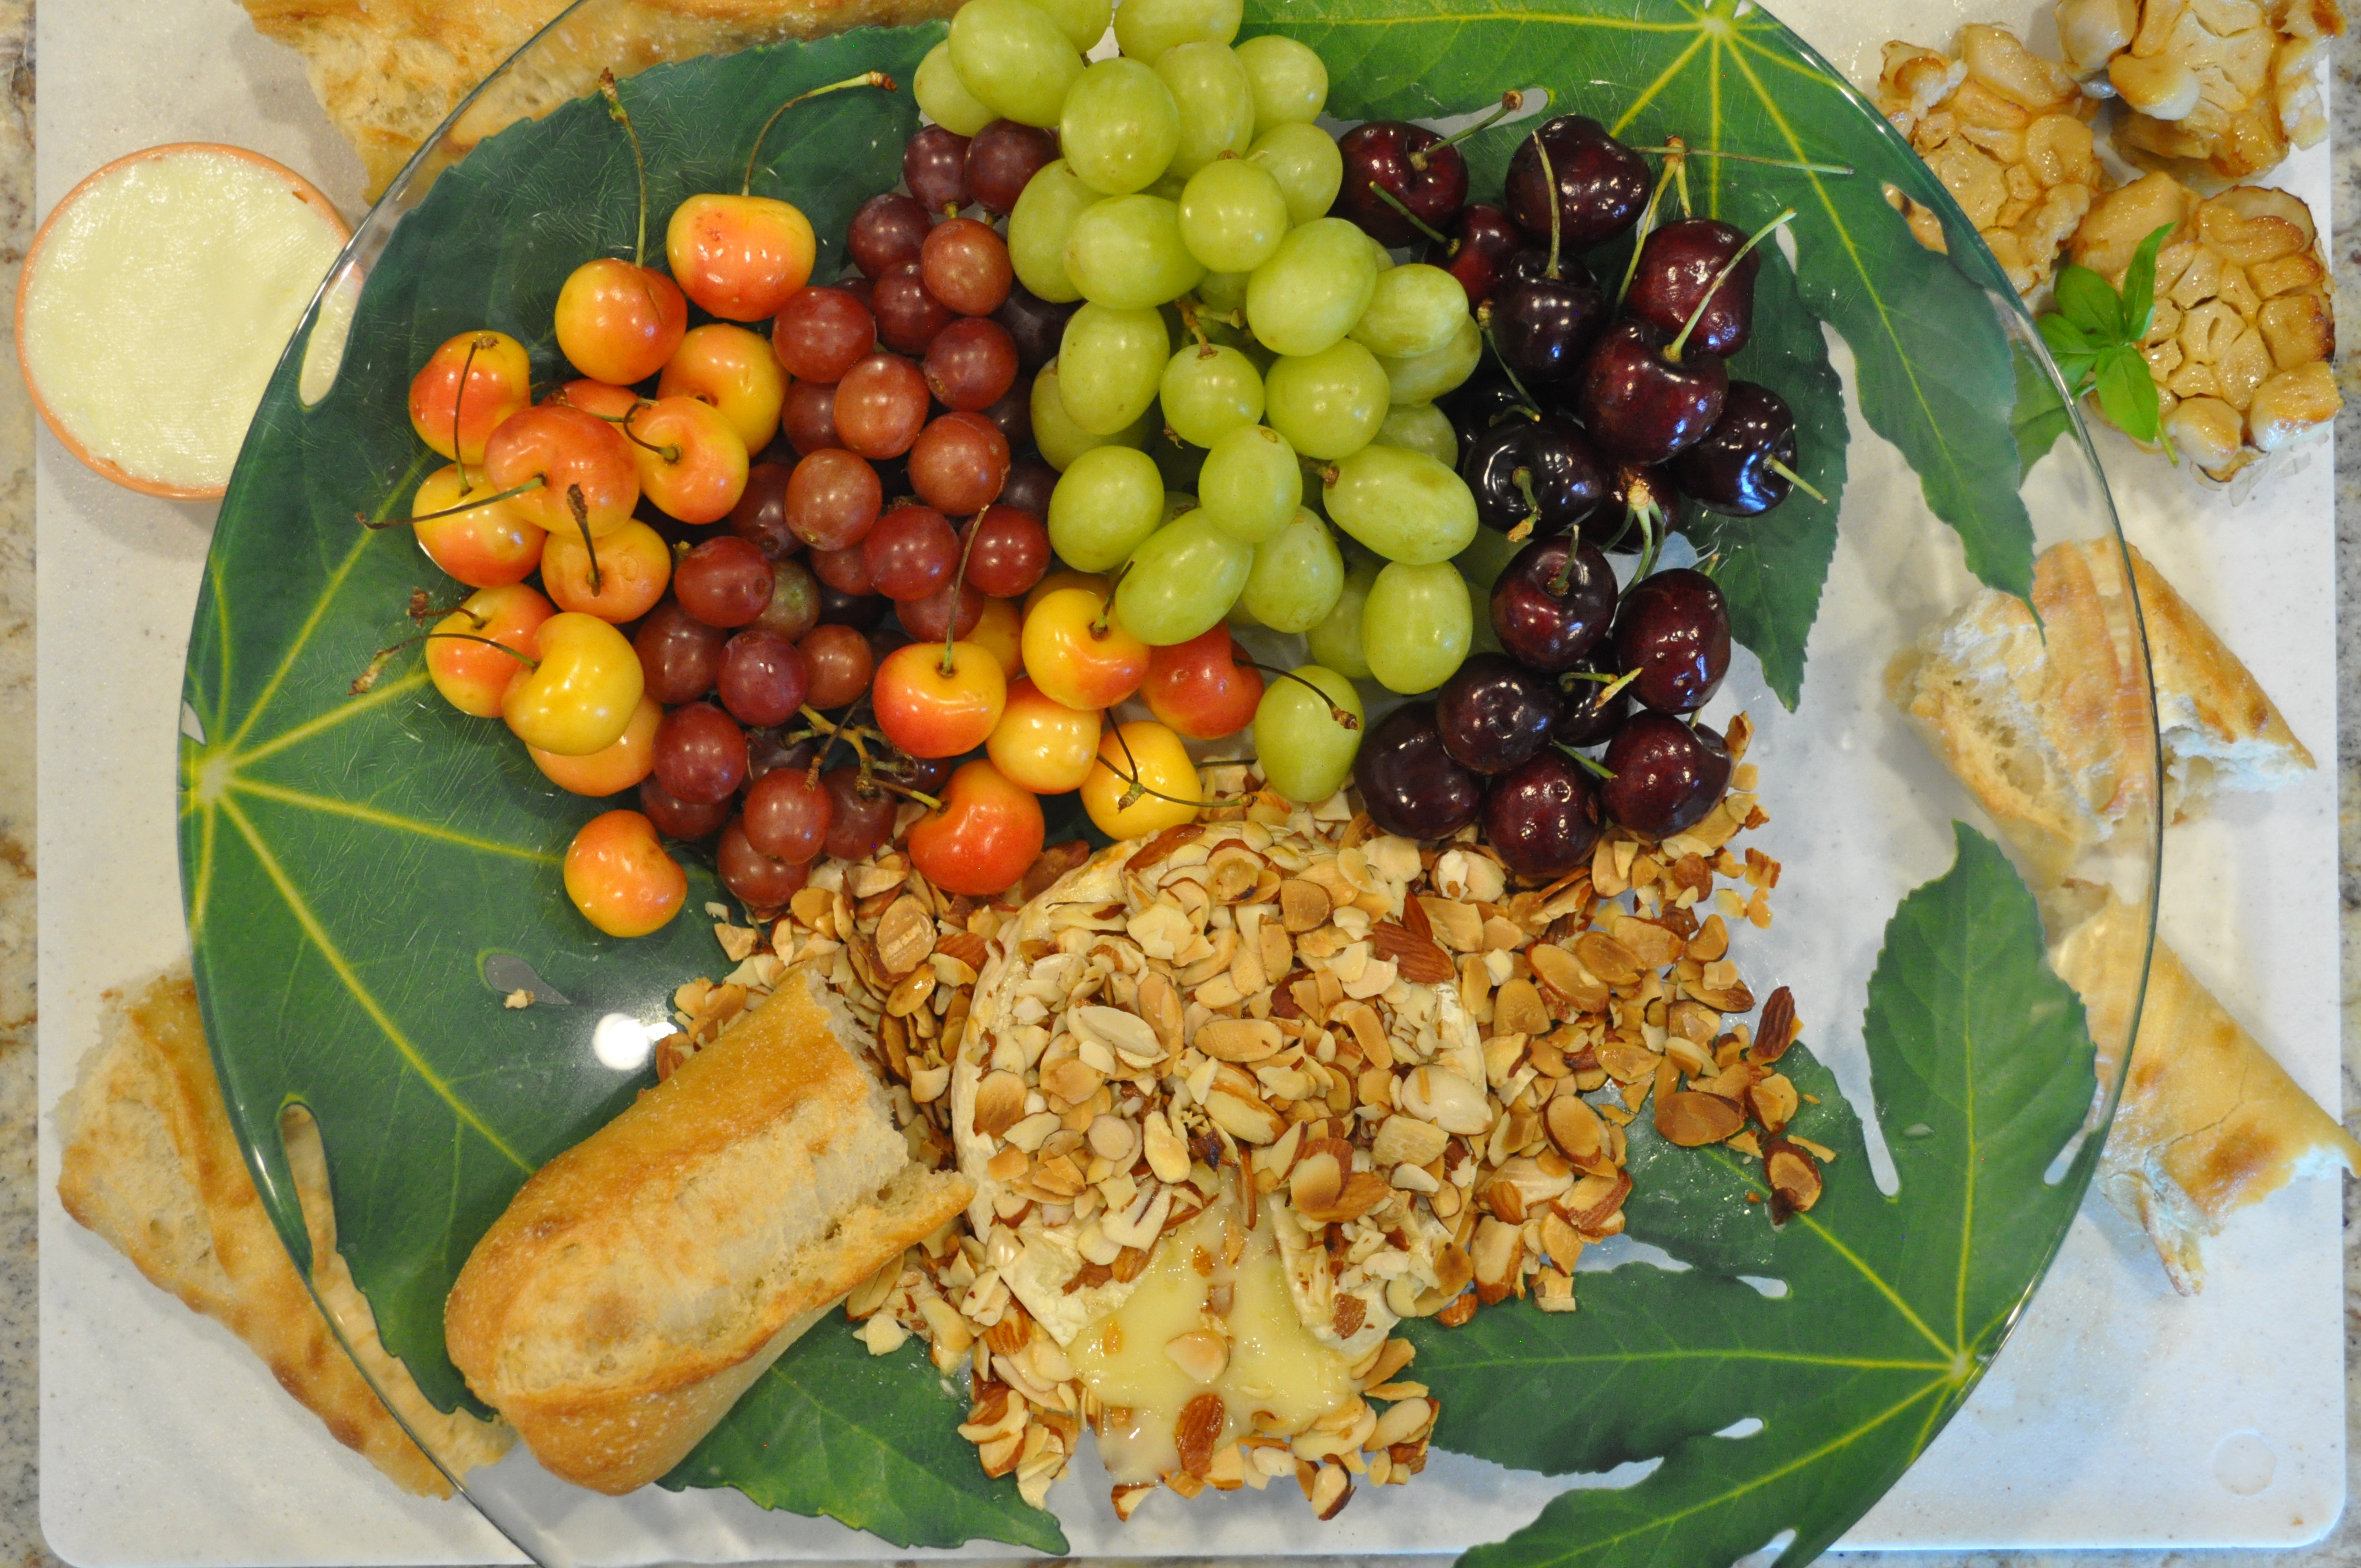
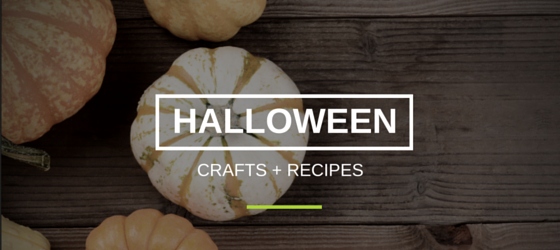
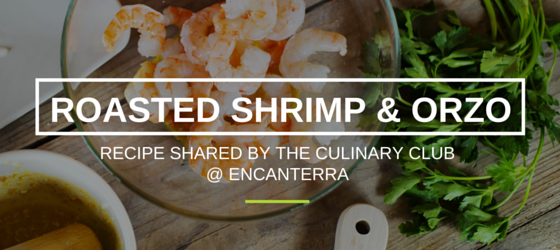
This week, we have another awesome recipe from Encanterra® resident and author, Jules Meyer’s upcoming cook book. If you missed the last recipe she shared with us (Creamy Baked Brie w/ Toasted Almonds), get it here — It’s super tasty! Now we’re lucky to get to try Jules’s Roasted Garlic Recipe, along with a personal introduction from the author herself. Check it out below!

 
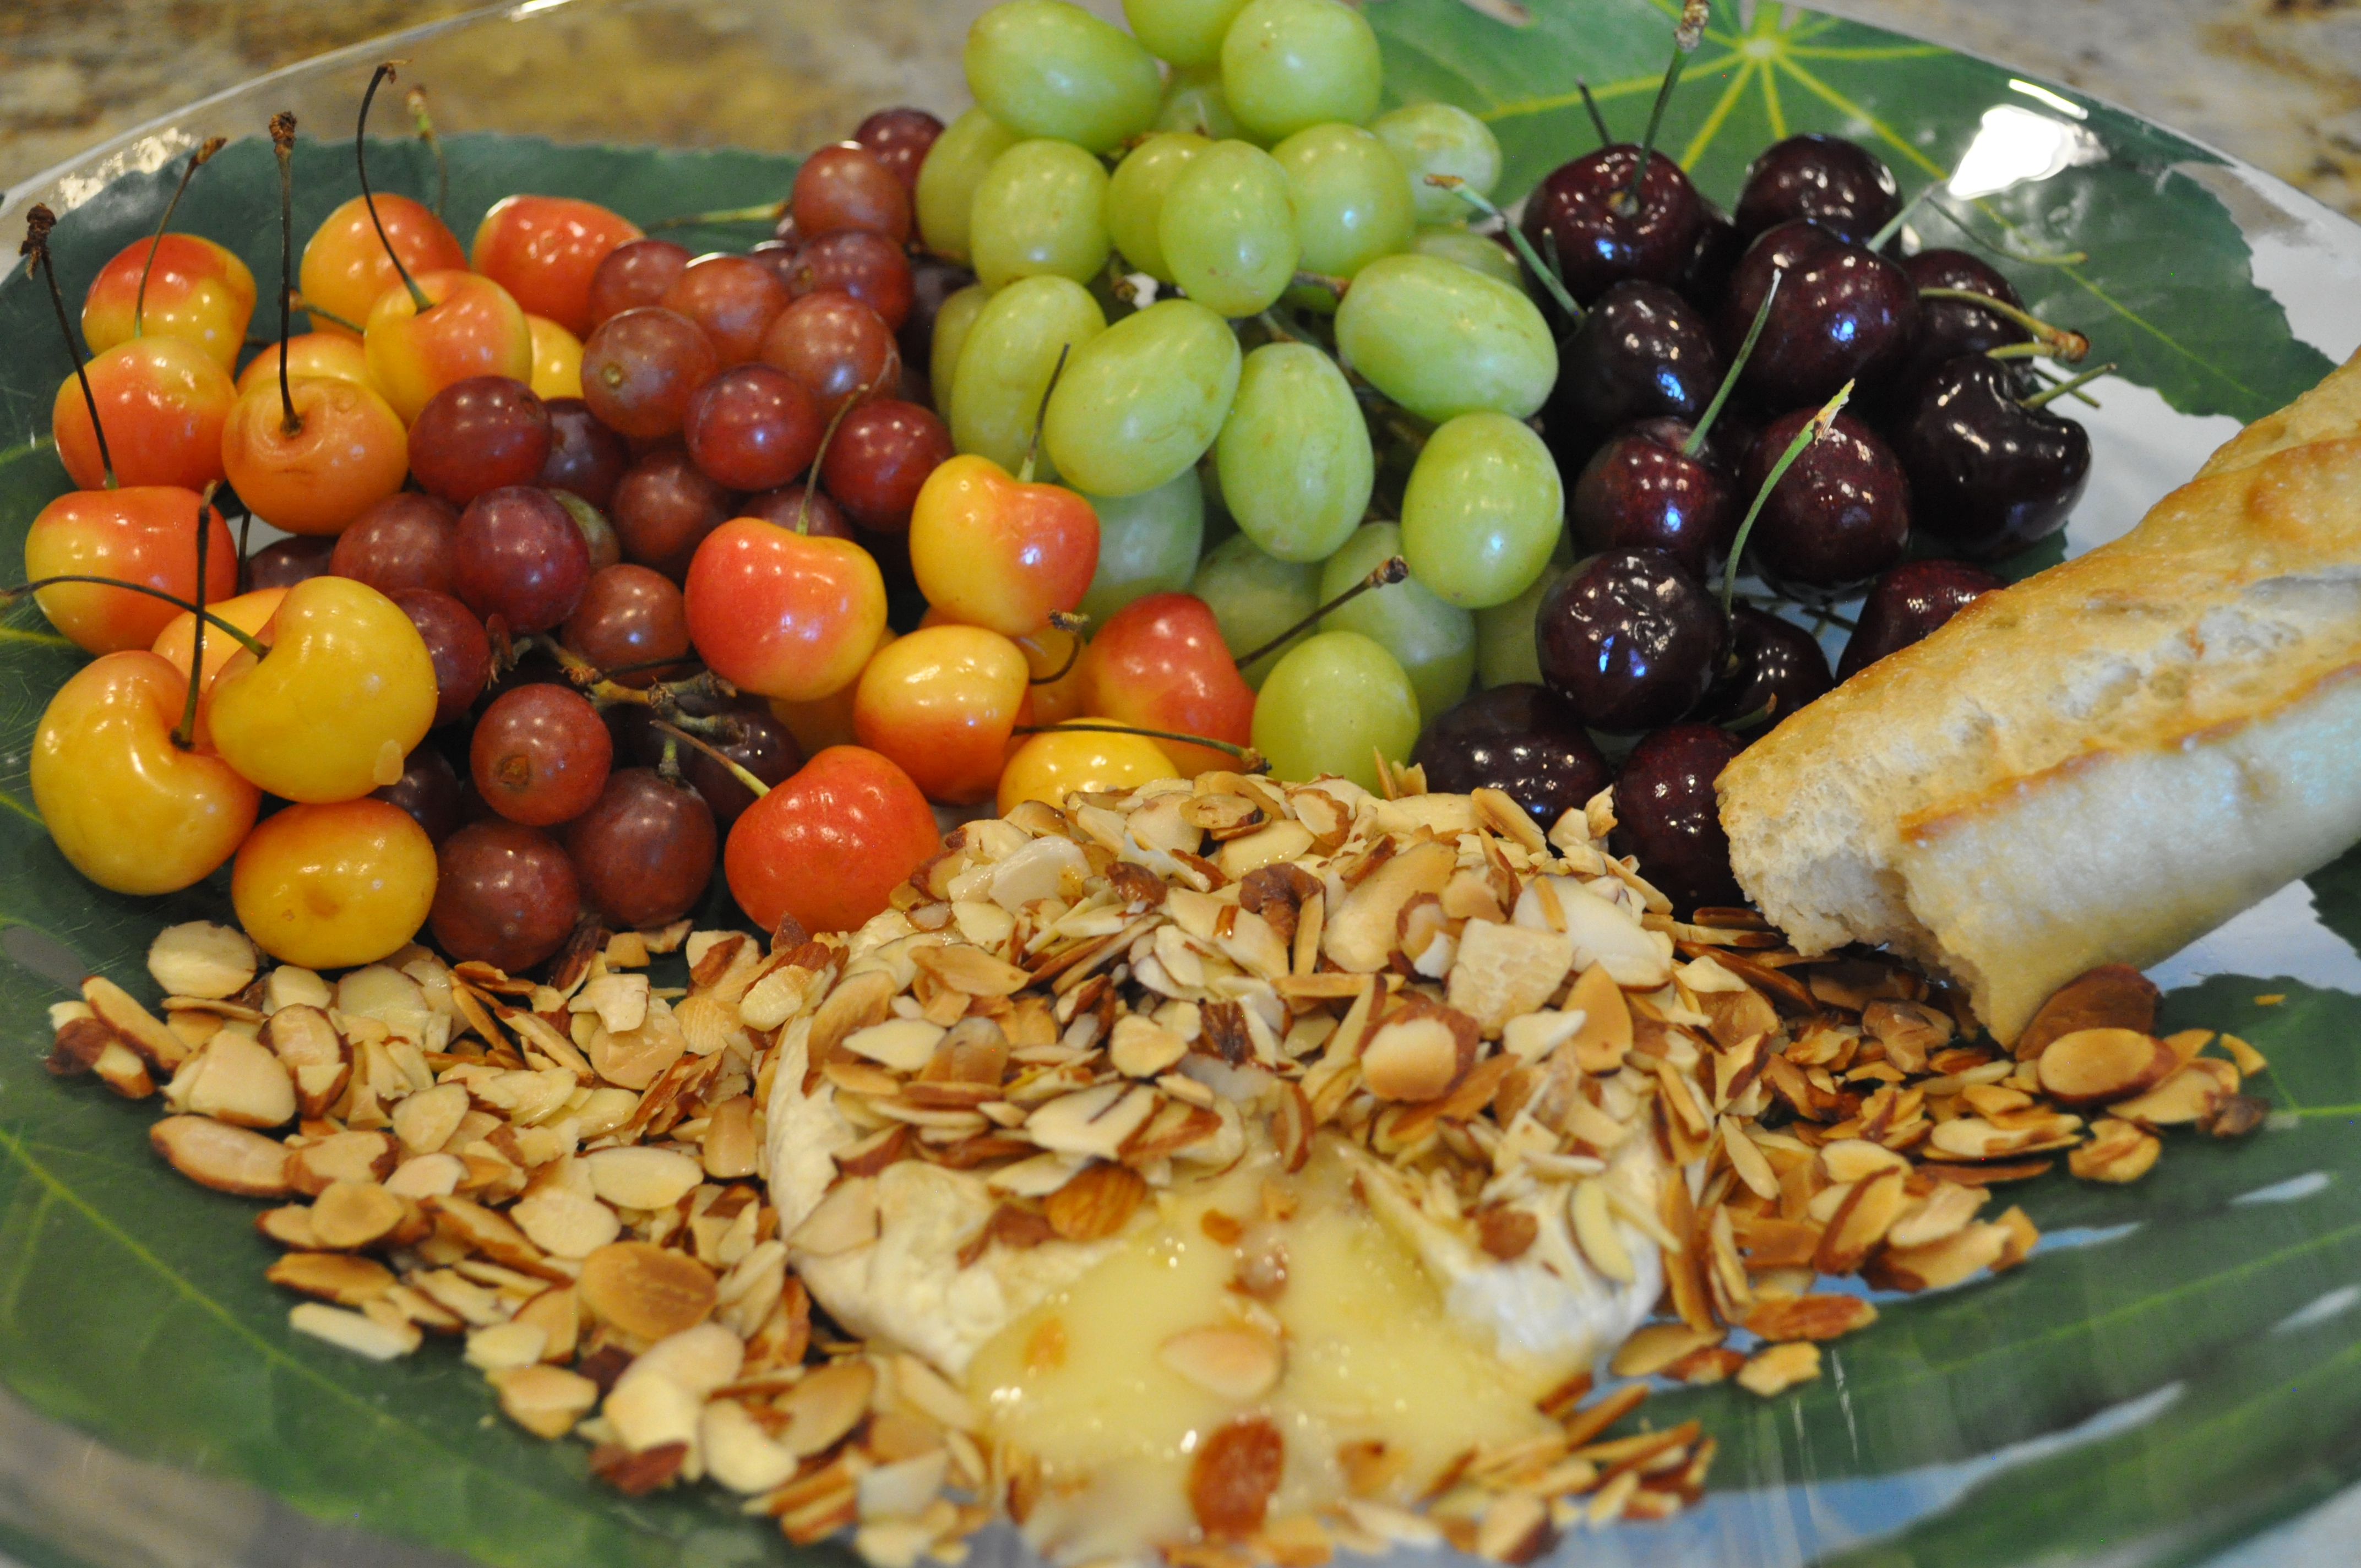
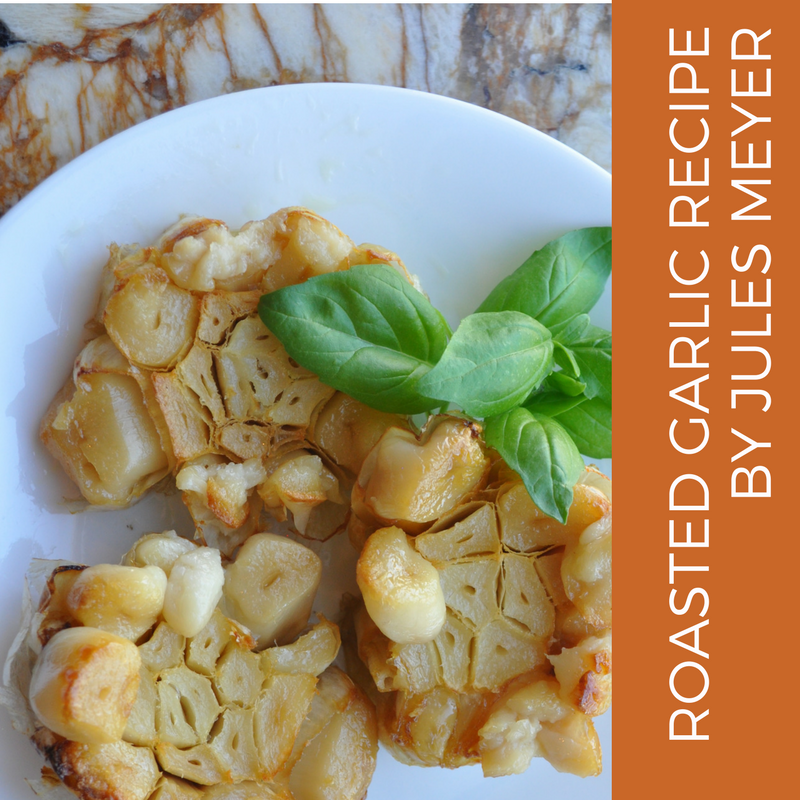
Roasted Garlic is mild, sweet and delicious! I love Roasted Garlic and always have some in my fridge so it’s ready for any recipe I may need it for. You can Roast Garlic many ways but I prefer to cook mine in the oven with a little olive oil, some dried herbs, and a little water to steam. I find the water helps the Garlic stay super plump and moist. The cloves easily pull up and out of its skin so it’s easy to use or spread. I made Roasted Garlic one night for a cocktail party and some of the guests had never had it before. They didn’t know Garlic could ever be so sweet and mild and spread like Butter. They were so surprised and loved it! Most recipes don’t add water to the pan but one time I added some water to the pan and I’ve made it this way ever since. I think this is what really makes it extra special. Of all the ways I have tried cooking Garlic this is my absolute favorite!
PREP TIME AND COOKING TIME
5 to 10 minutes to Prep 
50 Minutes to 1 hour to Bake plus 10-15 more Minutes to Brown 
Set oven to 425 Degrees
Garlic can be baked and kept in Tupperware with tight lid for up to 5 days in the fridge
INGREDIENTS
3 to 5 Large Garlic Bulbs– I always make extra to have on hand
1 to 2 Tbls Extra Virgin Olive Oil – enough to coat the top of each bulb 
Italian Seasoning or Dry Oregano – a pinch over the top of each bulb (Optional)
Water – 1⁄4 to 1⁄2 cup, just enough to cover the bottom of the pan to help steam the Garlic
STEPS
  1. Get an Oven Proof Glass Pie Plate or an Aluminum Pan (I use a round aluminum pan which is what I prefer) but either works just fine. Also get a piece of Aluminum Foil big enough to cover the pan tightly around the edges.
  2. Use a serrated knife to cut the Garlic in half. We will bake both halves.
  3. Place the Halved Garlic Bulbs with the Raw Garlic exposed and facing up, in your oven proof pan.
  4. Drizzle Olive Oil over the top of each Garlic Bulb just enough to coat. Sprinkle with Italian Seasoning or Dried Oregano *optional. *NOTE: The dry herbs are optional. I prefer to have a little bit of seasoning on them when serving as an appetizer but keep them plain when using for other recipes.
  5. Now, put a small amount of Water (1/4th to 1⁄2 C) in the dish just enough to help Steam the Garlic and make it Extra Creamy and Soft in Texture. Start with 1/4th Cup and see how that sits. You don’t want too much just enough to coat the bottom of the baking dish.
  6. Cover the dish tightly with Aluminum Foil and place in oven.
  7. Set timer for 50 minutes. *NOTE: In my oven the Garlic takes 60 minutes almost every time and then I take the foil off and bake 10-15 more minutes to brown the Garlic. Depending on your oven it may already be brown and you won’t have to add any more time to it.
 
HOW DO I KNOW WHEN IT’S DONE?

At 50 minutes take a peek. Take the Garlic out of the oven and lift the edge of the foil without tearing. If some of the Garlic is raised and coming up and out of the skin it is done. Usually you will see some of the Garlic sticking to the top of the foil. You can also stick a fork into the Garlic to see how soft it is. It should be soft. *If some Garlic isn’t coming up and out of the skin then put in oven for 10 more minutes. You can also add a little more Water to the pan if it has all cooked out. After 60 minutes take the Foil off and bake 10-15 more minutes to add a little Golden Brown Color to the Garlic (as *noted omit this step if already golden brown)  When the Garlic is done cooking set it on a hot pad or a cool burner with the foil lightly tented until ready to serve. It will be Creamy, Spreadable and delicious! If putting straight into the fridge let it get to room temp before putting it into your Tupperware container.
SERVING AND PLATING HINTS 
I prefer to keep the Garlic Cloves in the Bulb then put on a platter with Freshly Baked Crostini and some type of Soft Creamy Cheese such as Alouette or Boursin along with some Grapes and Strawberries. I like the presentation when the Garlic is served in its whole form. You can also push the Garlic Cloves up and out of the Skin and put in a little dish and serve with Freshly Baked Crostini and Crackers. Guests can easily spread it on this way. Spread on Toasted Baguette with Butter and then slather some of my “Creamy Baked Brie with Toasted Almonds” all over it.

Recipe | Creamy Baked Brie w/ Toasted Almonds by Encanterra® Resident and Author, Jules Meyer

We would like to thank Jules Meyer for providing us with a few excerpts from her upcoming book as well as a recipe. We hope you enjoy!
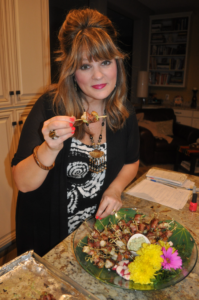
Jules has lived at Encanterra Country Club for 2 1/2 years and loves it! Living here has inspired her to follow her dreams of writing a Color, Step by Step Cookbook which is an accumulation of her own recipes she has created over her lifetime. Jules has spent almost her entire adult career in the hospitality industry and has had the opportunity to work in every aspect of it from Bartending all the way up to Director of Catering at a few fine Clubs in the Midwest. Jules PASSION however has always been Cooking, Creating and Entertaining. She loves teaching cooking classes out of her home for members and enjoys bringing them together through cooking, sipping wine and tasting the creations as a group. She was honored to take on the Chef along with another Member in the Grilled Cheese Challenge in April of this year, 2017. Her Winning Mini Grilled Cheese was stuffed with Chopped Sopressata, Sautéed Jalapenos, Crushed Fennel (her secret ingredient) and Lotsa Cheese! She has been working on her cookbook for the past two years and is excited to let everyone know that it is going into the design phase in the upcoming months and soon will be available in hard cover and soft cover in early 2018. You can contact Jules at gourmetgoddess@icloud.com.
 
CREAMY BAKED BRIE WITH TOASTED ALMONDS
Served with Crusty French Baguette, Freshly Baked Crostini or Take-n-Bake Baguette. Oh, and don’t forget the Butter! I was trying to think back to the first time I had Baked Brie and I think it was when I worked at TGI Fridays back in the day. They used to have a really extensive menu that read like a book and I’m almost certain Baked Brie was on that menu. So, anyway I have been making it ever since. There is something wonderful about the Warm, Creamy Brie melted all over the Crusty French Baguette and then topped with as many Toasted Almonds as possible. So this is how I eat it, I butter the Bread with Real Butter, slather the Melted Brie on top (a generous portion) and then flip the Bread with the Brie over and press it into the Almonds. The key for me is the Crunch of the Almonds with the Creamy Brie, so I like allot of Almonds. You could omit the Butter but why would you want to do that?! Anyway, it is true comfort food at its finest, simply delicious! It’s not an Appetizer you can bring to a party unless you are able to fully bake it in someone’s oven so I make this at home for my husband and I while we’re watching a football game, or as an Appetizer before a nice dinner, or for smaller parties of 4 to 8 people. It needs to be eaten right away as it comes out of the oven, Hot and Melty. After 5 to 10 minutes the Cheese hardens and it just isn’t the same. Another great thing about the Baked Brie is that it’s so easy, only has a few ingredients and presents nicely on a platter. The Toasted Shaved Almonds, the Crusty French Baguette, the Creamy Butter the Creamy Brie…addicting and superb! Yum!
Serves: 2 to 10 depending on the size of the Brie Wheel
PREP TIME AND COOKING TIME:
ï‚· 5 Minutes to Prep
ï‚· 20 to 30 minutes to Bake
ï‚· Preheat Oven to 350 Degrees
ï‚· Leftover Brie can be kept in the refrigerator and heated up in oven or microwave next
day.
INGREDIENTS:
ï‚· 8 oz. Brie Wheel or 19oz Brie Wheel (can also substitute Camembert)
 *NOTE: I prefer Crème Brie if I can find it. Costco or Sam’s Club have great prices on Large Brie Wheels (half the price of the regular store).
 1⁄2 to 1 Stick Room Temp Butter (depending on how many people you are serving) plus 2 Tbls to slather over the top and bottom of the Brie Wheel before cooking.
ï‚· 1 to 2 Cups Shaved Almonds (depending on Size of Brie Wheel) *Allot of Almonds is a must!
 Crusty French Baguette, Take-n-Bake Baguette or Homemade Crostini’s (Which you’ll find in this chapter)
 *Optional – 2 Whole Roasted Garlic Bulbs (you will find the recipe in this chapter) Roasted Garlic is delicious Spread onto the Baguette and then dipped into the Brie and topped with Almonds.
NOTES ON BREAD:
Crusty French Baguette:
This is my favorite for this recipe. I don’t slice it, I put it in the oven whole and get it nice and hot. The oven also brings out a little extra crunch on the outside of the Baguette. What’s nice is the inside will remain soft and chewy. Don’t confuse French Baguette with a Hoagie Roll because they are not even close. The French Baguette is Long and Narrow and has a Harder Outer Crust. It comes inside a long Brown Paper Bag and you can find it in the Fresh part of the Bakery section. I always press on the Baguette to make sure it is Fresh. They get stale after one day. When I serve this I serve it Whole and let people tear off pieces.
Freshly Baked Crostini:
You will find the recipe in this chapter. Crostini is just sliced Baguette. In this case
Take-n-Bake Baguette is sliced and done with Butter or Olive Oil and either Baked or Pan Fried. Crostini are good with the Brie but won’t have the same delectable effect as the Crusty French Baguette with Butter.
Take-n-Bake Baguette:
This is also delicious. Take-n-Bakes are usually found in the Fresh Bakery Section. They are partially baked and you finish them in the oven. I serve the Baguette Whole and let people tear off pieces.
STEPS:
1). Get a Glass Oven Proof Dish (such as a pie plate) or Tin. Make sure Oven is set to 350 degrees.
2). Get your Brie Wheel. *Do not remove the White Skin Layer. This is holding in the Cheese. If you remove it and try to bake it, you will have a cheesy mess. Generously Butter the Top and Bottom of the Brie Wheel and place in the dish.
3). Top the Brie with All the Shaved Almonds (1 Cup for small Brie Wheel and 2 Cups for the Large Brie Wheel. As I mentioned I love allot of Almonds I think this is the key to the success of this recipe. 
4). Set timer for 20 minutes. This will vary by oven and can take up to 30 minutes for the larger Brie Wheel. I like to check the Brie at 10 minutes and then at that time put the Baguette into the oven to warm. (the Baguette will take 10 to 15 minutes to warm).
HOW WILL I KNOW WHEN IT’S DONE?
The Brie will look like someone blew hot air into it. It will PUFF OUT. Squeeze the outsides with your fingers and if it gives easily and feels like it is about to POP then it’s done. The Almonds will be a nice Golden Brown. Baking really intensifies the Flavor of the Almonds and also gives them a nice crunch.
SERVING:
ï‚· Place the Brie on a Platter and Top with ALL the Almonds
ï‚· Serve with Grapes, Strawberries and/or Apple Slices
ï‚· Serve with Room Temp Butter and Crusty French Baguette on the Side
ï‚· Serve with Oven Roasted Garlic (see recipe in this chapter). Butter the Baguette, Add Butter, then the Creamy Roasted Garlic, then Melted Brie and Toasted Almonds). Yum!

Triple-Layer Peanut Butter Brownie Recipe

Prep Time | 15min.
Total Time | 2hr. + 15min.
Servings | 32 servings
Elevate brownies (in both senses of the word) with layers of chewy and creamy. This Triple-Layer Peanut Butter Brownie Recipe is a tall stack of yum.
Ingredients
1 pkg. (19 to 21 oz.) brownie mix (13×9-inch pan size)
1 pkg. (3.4 oz.) JELL-O Vanilla Flavor Instant Pudding
1 cup cold milk
1 cup creamy peanut butter
1/2 cup powdered sugar
1-1/2 cups COOL WHIP Whipped Topping (Do not thaw.)
3 oz. BAKER’S Semi-Sweet Chocolate
1/2 cup PLANTERS Dry Roasted Peanuts, coarsely chopped
Make It
Prepare and bake brownies in 13×9-inch pan as directed on package; cool.
Meanwhile, beat pudding mix and milk with whisk 2 min.
Add peanut butter and sugar; mix well.
Refrigerate until brownies are completely cooled.
Spread pudding mixture over brownies.
Microwave COOL WHIP and semi-sweet chocolate in microwaveable bowl on HIGH 1 min. or until chocolate is completely melted and mixture is well blended, stirring every 30 sec.
Spread over pudding mixture; sprinkle with nuts.
Refrigerate 1 hour.
https://www.sheapreferred.com/wp-content/uploads/2017/03/Triple-Layer-Peanut-Butter-Brownies-Video.mp4

Recipe | Sherry Wine Cake by Natalie and Al W. on Laddoos Ave.

sherry-wine-cake-by-natalie-and-al-w-on-laddoos-ave

Natalie and Al love to share the holiday season with their friends and family. Each year, Natalie makes her famous Sherry Wine bundt cake and it’s always a hit! It’s extremely easy to make but will make each holiday gathering seem uniquely special.  
Sherry Wine Cake
1 pkg yellow cake mix (e.g, Duncan Hines)
1 pkg vanilla pudding mix
3/4 c. vegetable oil
2/3 c. sherry wine
1 teas. nutmeg
1 c. walnuts chopped fine
Preheat oven to 350 degrees.  Prepare the bundt pan. Mix the dry cake mix and the dry pudding. Add the vegetable oil, nutmeg and the Sherry. Beat on high to mix well. Add eggs, beating them into the mix one at a time. Add the nuts and beat. Pour the mix into the oiled and floured bundt pan. Bake at 350 degrees for 40-45 minutes. Let the cake cool completely. Sprinkle with powdered sugar. Enjoy!!!

​Gingerbread Pear Loaf Recipe by Frank and Kit P. on Elysian Pass

img_1715

Makes 2 (8 ½ “ x 4 1/2 “)
With their elegant tapering necks and firm texture, whole Bosc pears baked into this rustic loaf elevate its look and taste.
POACHED PEARS
5 (12 oz) bottles ginger beer*
2/3 cup granulated sugar
2 cinnamon sticks
8 cardamom pods
6 firm Bosc pears, peeled
In large Dutch oven, combine ginger beer, granulated sugar, cinnamon, and cardamom. Bring to a boil over medium-high heat. Reduce heat to medium, and simmer until reduced by half, about 1 hour and10 minutes. Remove from heat, and let stand for 15 minutes. In a large bowl, place pears. Pour syrup over pears. Refrigerate for at least 12 hours.
CAKE
¾ cup unsalted butter, softened
1 ½ cups firmly packed light brown sugar
2 large eggs
½ cup unsulphured molasses
1 teaspoon vanilla extract
2 ½ cups all-purpose flour
2 ½ teaspoons ground ginger
1 teaspoon baking powder
1 teaspoon ground cinnamon
½ teaspoon kosher salt
½ teaspoon ground nutmeg
¼ teaspoon ground cloves
½ teaspoon ground allspice
½ cup whole milk
½ cup sour cream
3 tbsp ginger sugar
1. Preheat oven to 325 degrees. Spray 2 (8 ½” x 4 ½”) loaf pans with baking spray with flour
2. In the bowl of a stand mixer fitted with the paddle attachment, beat butter and brown sugar at medium speed until fluffy, 2 to 3 minutes, stopping to scrape sides of bowl. Add eggs, one at a time, beating well after each addition. Stir in molasses and vanilla.
3. In a medium bowl, whisk together flour, ginger, baking powder, cinnamon, salt, nutmeg, cloves and allspice. Gradually add flour mixture to butter mixture alternately with milk, beginning and ending with flour mixture, beating just until combined after each addition. Stir in sour cream. Spread batter evenly into prepared pans.
4. Strain pear mixture, discarding excess fluid. Place 3 pears, stems up, in each prepared pan. (Gently place pears ¼ “ into batter so pears do not sink to bottom.) Sprinkle with ginger sugar.
5. Bake for 10 minutes. Gently pull pears by stems to ensure they remain upright during remainder of baking time. Continue baking until a wooden pick inserted into center comes out clean, about 1 hour and 15 minutes, loosely covering with foil to prevent excess browning, if necessary. Let cool in pans for 15 minutes. Remove from pans, and let cool completely on wire racks.


Halloween Crafts + Recipes

Halloween crafts + recipes

Halloween jumps starts the holiday season with warm flavors, welcoming decor, and youthful fun for everyone.  As any super-crafty person will tell you, this makes it the absolute best time of year for all things DIY. Get your family and friends together to try out some (or all!) of these crafts and recipes.

SImply Kierste pretty pumpkinsStriped & Polka Dot Pumpkins
What a seriously adorable Halloween decoration! Pretty easy to do, and there are ideas for other holidays on the blog as well.


Pumpkin seed reicpes image | swankyrecipes10 Pumpkin Seed Recipes 
Swanky Recipes details everything you need to know about  preparing and drying the seeds, plus 10 different recipes for you to try. Never throw out the seeds from your pumpkin carve again.


diy mini caramel apples | athomeiminloveMini Caramel Apples 
These are just amazing— delicious caramel apples in neat, bite-sized portions. Best idea ever?


Glow-in-the-dark slime recipeGlow in the Dark Slime  
For the kiddos. You can tackle this mini-science project together, then switch off the lights and watch their little faces light up with delight!


Pretty Pumpkins | Decorating Your Space11 Ideas for Pretty Pumpkins
Decorating Your Small Space put together this list of extra fancy pumpkin ideas, including this absolutely amazing Tinker Bell! I just love the idea of turning a pumpkin into a lantern.


Recipe | Chocolate Chip Cookies from Marilyn on Verde Blvd at Encanterra®

sp-chocolate-chip-cookies

If you have ever stopped by Marilyn’s home you have probably been offered one of her amazing chocolate chip cookies! This recipe was given to Marilyn over 20 years ago by her friend Edna from Franklin, Tennessee. Edna had a daughter the same age as Marilyn’s daughter, Kelly. The girls would play together and enjoy these cookies!
CHOCOLATE CHIP COOKIES
2/3 cup Shortening
½ cup Dark Brown Sugar
½ cup Granulated Sugar
1 Egg
1 tsp. Vanilla
1 ½ cups Flour
½ tsp. Baking Soda
½ tsp. Salt
6 ounces Chocolate Chips
½ cup Walnuts, chopped (optional)
Cream the shortening and sugars. Add egg and vanilla and beat thoroughly. Sift the flour, baking soda, and salt together and add to the creamed mixture. Stir in the chocolate chips and walnuts. Drop by teaspoonfuls onto an ungreased cookie sheet. Bake at 375 degrees for 8 minutes. Enjoy!

Recipe | Italian Spaghetti from Sherry + Dave B. on Azafran Trail at Encanterra®

SP Italian Spaghetti Recipe

Sherry has been making this recipe for her husband for almost 45 years. It’s a Betty Crocker favorite and comes from the cookbook they received as a wedding gift. Their cookbook is falling apart at the seams and their family loves gathering together for this meal. This recipe produces a thick and flavorful sauce that everyone loves!
2 pounds ground beef
1 medium onion, finely chopped (about 1/2 cup)
1 green pepper, finely chopped
2 cans tomato sauce
2 cans tomato paste
1 can pitted ripe olives, drained and sliced
2 packets of Italian style spaghetti sauce mix
3 cups water
1 tablespoon of sugar
1 teaspoon oregano leaves
2 cloves of garlic (crushed)
1 bay leaf, crumbled
16 ounces of Italian-style spaghetti
Cook and stir ground beef, onion and green pepper until meat is brown and onion is tender. Stir in remaining ingredients except spaghetti. Cover; simmer for 1.5 hours, stirring sauce occasionally. Cook spaghetti as directed.

Recipe: Homemade Ice Cream

SP Homemade Ice Cream Recipe (1)
Is there anything better on a desert summer day than ice cream? We can’t think of anything! Ice cream is a magically delicious treat and we think it deserves every day of this month’s National Ice Cream Month title. Here are some fun ice cream facts, plus a recipe for nearly instant homemade ice cream:
FUN ICE CREAM FACTS
  • Vanilla is the most popular flavor of ice cream
  • The ice cream soda was invented in 1874
  • It takes roughly 50 licks to finish an ice cream cone
  • California produces the most ice cream in the United States
  • You can make homemade ice cream in a bag! Check out the recipe below…

QUICK & EASY HOMEMADE ICE CREAM RECIPE


GALLON-SIZE ZIPLOCK BAG:
Ice cubes +
1/2 cup kosher salt
PINT-SIZED ZIPLOCK BAG:
1 cup half & half +
2 tbsp granulated sugar +
1/2 tsp vanilla extract or other flavoring +
Any of your favorite ice cream mix-ins
INSTRUCTIONS:
Combine ice cream ingredients in the pint-sized bag, and combine ice cubes + kosher salt in the gallon-sized bag. Then place the small bag and shake for 5-10 until ice cream reaches desired consistency. Add in your mix-ins and enjoy!

Roasted Shrimp & Orzo Recipe

SP Roasted Shrimp & Orzo Recipe

The Culinary Club at Encanterra® was kind enough to share with us one of their favorite summertime recipes, served cold or at room temp, from The Barefoot Contessa. Yummy!
Roasted Shrimp and Orzo
Ingredients:
Kosher salt
Quality olive oil
3/4 pound orzo pasta (rice-shaped pasta)
1/2 cup freshly squeezed lemon juice (3 lemons)
Freshly ground black pepper
2 pounds (16 to 18 count) shrimp, peeled and deveined
1 cup minced scallions, white and green parts
1 cup chopped fresh dill
1 cup chopped fresh flat-leaf parsley
1 hothouse cucumber, unpeeled, seeded, and medium-diced
1/2 cup small-diced red onion
3/4 pound good feta cheese, large diced
Directions:
Preheat the oven to 400 degrees F.
Fill a large pot with water, add 1 tablespoon of salt and a splash of oil, and bring the water to a boil. Add the orzo and simmer for 9 to 11 minutes, stirring occasionally, until it’s cooked al dente. Drain and pour into a large bowl. Whisk together the lemon juice, 1/2 cup olive oil, 2 teaspoons salt and 1 teaspoon of pepper. Pour over the hot pasta and stir well.
Meanwhile, place the shrimp on a sheet pan, drizzle with olive oil, and sprinkle with salt and pepper. Toss to combine and spread out in a single layer. Roast for 5 to 6 minutes until the shrimp are cooked through. Don’t overcook!
Add the shrimp to the orzo and then add the scallions, dill, parsley, cucumber, onion, 2 teaspoons salt, and 1 teaspoon pepper. Toss well. Add the feta and stir carefully. Set aside at room temperature for 1 hour to allow the flavors to blend, or refrigerate overnight. If refrigerated, taste again for seasonings and bring back to room temperature before serving.


« Previous Page
Next Page »

New Listing
Notifications

  • Email Alerts for New Homes
  • Save Your Favorites
  • Price Change Notifications
  • Plus More...
Sign Up

What's Your
Home Worth?

Find Out

Categories

Client Testimonials

"“Very personable and extremely easy to work with. Everything was awesome. TJ’s personality and knowledge made selling our home a very easy... continued"
- Louise & Barry
View All

Listing Notifications

Sign Up! New listings delivered to your inbox!
Sign Up Now

Stay Connected

  • Email
  • Facebook
  • Instagram
  • Pinterest
  • Twitter
  • YouTube


Ben Leeson and TJ Kelley

Arizona Experience Realty Group Resale Broker for the SHEA Preferred Program

480-677-8170

Info@ENCBrokers.com


36460 N Encanterra Drive Queen Creek, AZ 85140

sitemap   •   admin   •   ©2025 All Rights Reserved  •  Real Estate Website Design by IDXCentral.com